CloudBeaver (http://localhost:8978) is a database client that runs in the browser. It is the comfortable way to look at the class database and to write SQL against it.
Two different logins are involved — that is the one confusing thing here. First you log in to CloudBeaver itself (
student/Kingo2026!), and once, on first use, you give it the database’s password (student/kingo2026). Different passwords, on purpose.
1. Log in to CloudBeaver
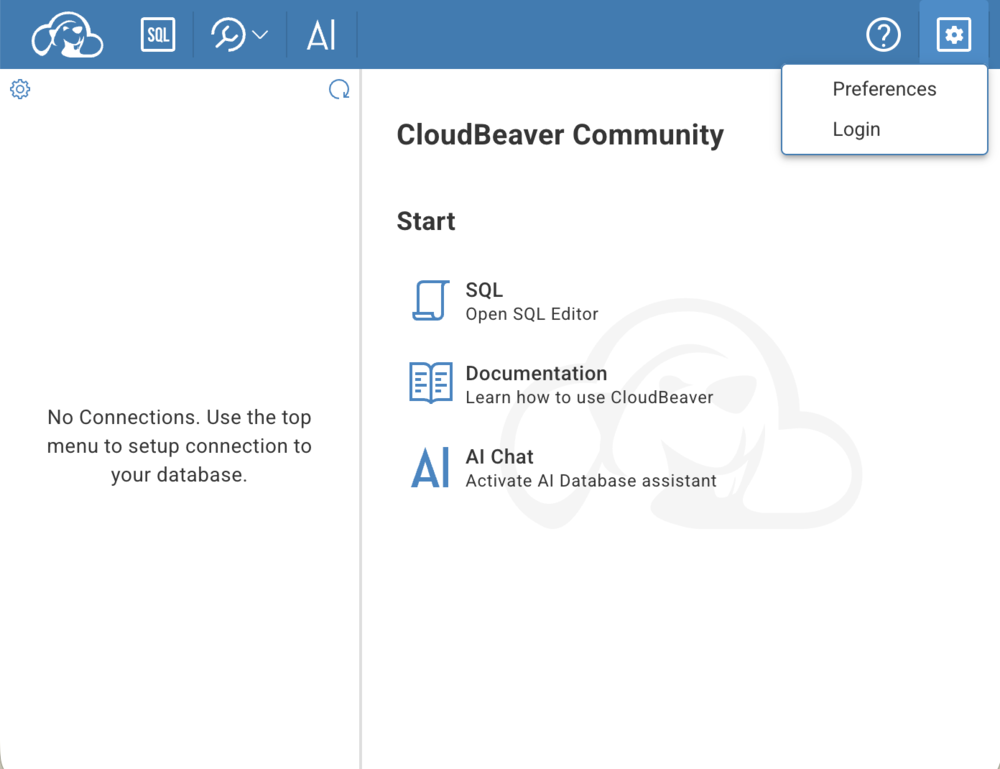
Open http://localhost:8978. The first page says “No Connections. Use the top menu to setup connection to your database.” — that is normal, it just means you are not logged in yet.
-
Click the gear icon in the top-right corner.
-
Choose Login.
-
User name
student, passwordKingo2026!, then LOGIN.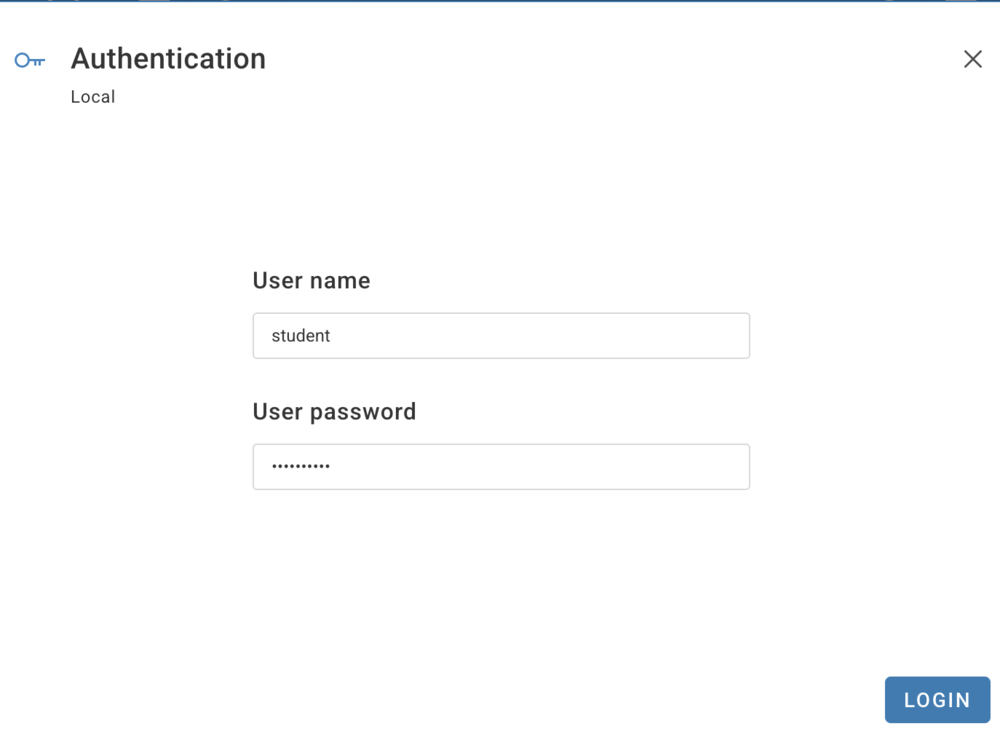
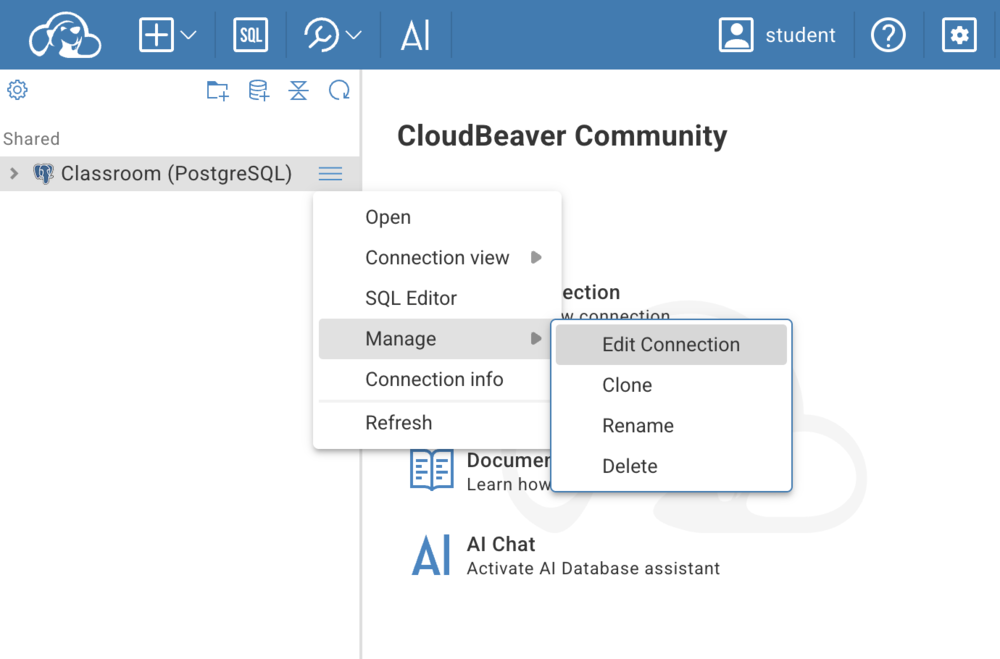
Your name now appears in the blue bar, and the left panel shows Shared → Classroom (PostgreSQL). (The connection is pre-made for you — you never have to create one.)
2. Give it the database password — once
Click Classroom (PostgreSQL). CloudBeaver asks for the database credentials. If it does not ask, click the ≡ menu next to the connection → Manage → Edit Connection:
You land on the MAIN tab. Everything except the password is already filled
in — check that it says Database classroom (that is the class database;
the server also holds the internal databases of Langflow, n8n and Metabase,
which you should leave alone), then type the password:
| Field | Value |
|---|---|
| Host | postgres |
| Port | 5432 |
| Database | classroom |
| Authentication | Username/password |
| User name | student |
| User password | kingo2026 |
| Save credentials for all users with access | tick it |
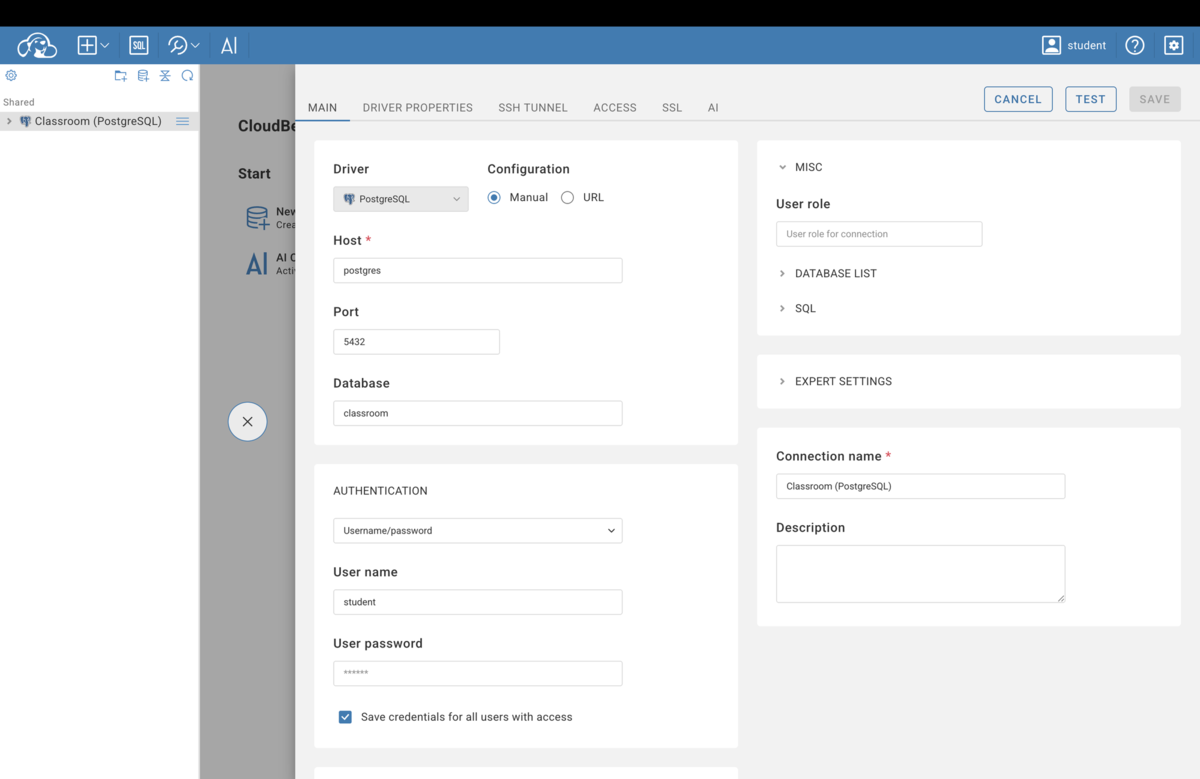
Then TEST (should say the connection works) and SAVE — both buttons sit at the top right. You only do this once: CloudBeaver remembers it from then on.
3. Look at the data
Expand Classroom (PostgreSQL) → classroom → Schemas → public → Tables.
The class sample data is there: products, customers, orders. Double-click
a table to see its rows.